Tile Shower Installation: How a Pro Builds a Shower That Lasts
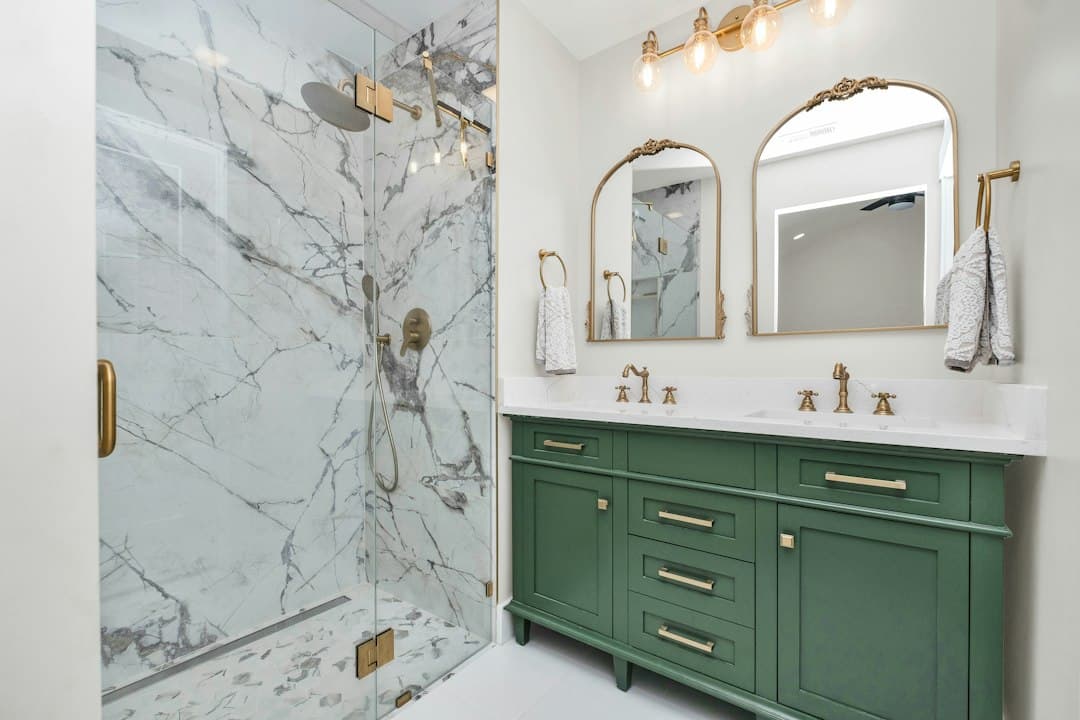
Tile shower installation is the process of building a waterproof shower and setting tile on its walls and floor so water never reaches the house framing. A professional job covers demo, backer board, waterproofing, a sloped shower pan or foam tray, tile, grout and caulk. In Greater Boston, a tiled shower runs about $15 to $40 per square foot installed (as of 2026 pricing). Most take 4 to 8 working days from demo to grout. This deep-dive builds on our tile shower installation Complete Guide and covers the build details that decide whether a shower lasts.
Key Takeaways
- Waterproofing is the real job. Tile and grout are not waterproof. We roll RedGard on the walls and build the floor on a Schluter Kerdi tray or a sloped mud pan.
- Two shower floor options. A foam tray is fast with a factory slope. A mud pan fits any shape and any drain spot.
- Build details matter. A recessed niche is $300 to install. We connect the Kerdi drain ourselves. A plumber is only needed to move a drain or valve.
- Timeline: 4 to 8 working days for most showers, depending on size and repairs.
- Cost: $15 to $40 per square foot installed, with labor at $10 to $22 per square foot (based on current Greater Boston rates).
- You pick and buy the tile. We recommend suppliers and bring all the setting materials.
Planning a walk-in shower or a tub-to-shower conversion? Send us photos of your current shower for a same-day tile shower estimate. A few phone pictures of the walls, floor and valve are enough for us to price it.
What Does a Professional Tile Shower Installation Include?
A professional tile shower installation has seven stages: demo, backer board, waterproofing, the shower floor, tile, grout and final caulk. Skip or rush one and the shower fails early. The usual failure is a slow leak behind the tile that nobody sees for years.
- Demo. We remove the old tile, backer and mortar bed down to the studs and subfloor. Then we check for rot, soft subfloor and signs of old leaks. Debris leaves with us.
- Backer board. We hang cement board on the walls and shim the studs so the walls are flat and plumb. Flat walls matter most for large format porcelain like 12x24 or 24x48.
- Waterproofing. Walls get RedGard liquid membrane. The floor gets a Kerdi foam tray or a waterproofed mud pan tied into the drain.
- Shower floor. The floor slopes 1/4 inch per foot toward the drain, the standard slope for a mortar bed shower pan.
- Tile. We set tile in polymer-modified thin-set. Large tiles get back-buttered to reach 95% or better mortar coverage, the target for wet areas.
- Grout and trim. We grout with Laticrete Permacolor. Metal edge trim on outside corners and niche edges is finished to match the grout color.
- Caulk and seal. Every inside corner and the joint where walls meet the floor gets flexible sealant, not grout. Natural stone like marble also gets sealed.
How Do You Install Tile on a Shower Wall?
Installing tile on a shower wall starts with layout, not mortar. We find the center of the back wall and plan the cuts so no corner ends up with a thin sliver. We also line up grout joints with the niche and the valve trim. Then we fix a straight ledger board for the first full row and work up the wall.
Each tile goes into thin-set combed with a notched trowel. Large porcelain gets mortar on the back too. We use tile leveling clips such as Raimondi or Spin Doctors to keep edges flush. Cuts happen on a wet saw so porcelain edges stay clean. The bottom row waits until the floor is in, so the wall tile sits over the floor tile and sheds water inward.
How Should a Tile Shower Be Waterproofed?
A tile shower is waterproofed by the membrane behind the tile, not by the tile or grout. Grout is porous and lets water pass through. Our standard build uses RedGard on the walls and a Schluter Kerdi tray and curb or a mud pan on the floor.
What Is RedGard?
RedGard is a liquid waterproofing membrane made by Custom Building Products. It goes on pink and dries red, so you can see when a coat has cured. We roll it over the cement board in more than one coat. Corners, board seams, screw heads, the valve and the shower head pipe get extra attention.
Why RedGard Walls Instead of Full Kerdi Sheet?
We prefer liquid membrane on walls because it has no seams. Schluter Kerdi sheet membrane is a good product, but every seam needs a 2-inch overlap bonded in thin-set. A full shower has dozens of seams and pipe penetrations, and each one is a place for a mistake. A liquid coat wraps around odd framing in older Boston homes without cutting and patching.
Kerdi still has a job in our showers. We use Kerdi-Band only where a Kerdi tray or Kerdi curb meets the wall. That band bridges the joint between the floor system and the RedGard walls.
Product | Type | Where we use it |
|---|---|---|
Custom Building Products RedGard | Liquid membrane | All shower walls, niches |
Schluter Kerdi shower tray | Pre-sloped foam base | Shower floors with a standard drain spot |
Schluter Kerdi curb | Foam curb | Shower entry with a tray |
Schluter Kerdi-Band | Waterproof strip | Only where a tray or curb meets the wall |
Schluter Kerdi-Drain | Bonding flange drain | Tray and mud pan floors |
Laticrete Hydro Ban | Liquid membrane | Common alternative; not our standard |
Mud Pan vs Foam Tray: Which Shower Floor Is Better?
Both shower floors work well when they are built right. A Schluter Kerdi foam tray is faster and has a factory slope. A mud pan takes longer but fits any shape, size or drain location. We pick based on your layout, not on habit.
What Is a Mud Pan?
A mud pan is a shower floor made from a sand and cement mortar bed that we float by hand. We slope it 1/4 inch per foot toward the drain and tie it into the drain. It is the traditional method and still the most flexible one. It works for curbless entries, odd-shaped showers and drains that sit off center.
What Is a Kerdi Foam Tray?
A Kerdi tray is a pre-sloped foam base covered in Kerdi membrane. It pairs with a Kerdi-Drain and comes in set sizes that we can trim. It is light and accurate, and tile can go down the same day it is set. We connect the Kerdi drain ourselves.
Foam Tray vs Mud Pan Compared
- Slope: The tray slope is factory-set. The mud pan slope is floated by hand to 1/4 inch per foot.
- Shape: Trays come in standard sizes and can be cut down. Mud pans fit any footprint.
- Drain: Trays expect the drain in a set spot. Mud pans can slope to a drain almost anywhere.
- Speed: Trays save time. A mud bed needs to set up before tile goes on.
- Best for: Trays suit standard alcove showers. Mud pans suit custom and curbless showers.
Shower floor tile should be small enough to follow the slope. Penny tile and hex mosaic in porcelain run about $10 per square foot for material and bend easily to the pan. Large tiles on a shower floor usually need a linear drain so the floor slopes in one direction.
Niches, Curbs and Drains: What Should You Plan For?
Niches, curbs and drains are the details that make a shower work day to day. Each one adds labor, so decide on them before demo starts. Each one also shows up as its own line in our quotes. Our guide to bathroom tile installation cost in Boston shows how these add-ons stack up in a full room.
Shower Niches
A niche is a recessed shelf built between the wall studs. Ours are $300 to install. We waterproof the niche with the rest of the wall and slope the bottom shelf outward so water drains off. We avoid exterior walls when we can, because Boston freeze-thaw cycles stress waterproofing on outside walls. We also size the niche to land on grout lines, so the cuts look planned.
Curbs and Curbless Entries
A curb is the low wall at the shower entry that holds water in. We build it from a Kerdi curb or from framing and mortar. The top slopes slightly into the shower. A curbless shower has no step at all. It needs a linear drain and a floor that is recessed or built up, so it is a bigger job and usually a mud pan.
Center Drain vs Linear Drain
- Center drain: The floor slopes in from four sides. It works with mosaics and is the most common setup.
- Linear drain: A long, narrow drain at one wall or the entry. The floor slopes one way, so larger tiles work.
We connect the Kerdi drain as part of our job. You only need a plumber if the drain or the shower valve has to move to a new spot.
How Long Does a Tile Shower Installation Take?
A tile shower installation takes 4 to 8 working days in most homes, based on our jobs across Greater Boston since 2016. A standard alcove shower with a foam tray lands at the short end. A large shower with a mud pan, a bench or marble lands at the long end.
- Day 1: Demo, haul-away and inspection of the studs and subfloor.
- Day 2: Backer board, niche framing and the tray or mud pan.
- Day 3: RedGard coats on the walls and Kerdi-Band at the tray joint.
- Days 4 to 6: Wall tile, then floor tile.
- Day 7: Grout, metal trim, sealant and cleanup.
Some things stretch the schedule. Rotted studs or subfloor need repair before backer board goes up. A plumber visit to move a valve adds a day of waiting. Herringbone and chevron layouts take longer to cut, and herringbone uses about 10 to 15% more tile. Marble needs sealing before grout, which adds a step.
Can You Shower Right After the Grout Is Done?
No. Grout and sealant need time to cure before they get wet. Cure times depend on the product and the room temperature. We tell you the exact day you can use the shower when we finish the job.
How Much Does a Tile Shower Cost in Boston?
A tile shower in Boston costs about $15 to $40 per square foot installed (as of 2026 pricing). Labor makes up $10 to $22 per square foot of that. A typical shower has 40 to 120 square feet of tile across the walls and floor. For whole-bathroom budgets, read our Boston bathroom tile cost guide.
You buy the tile, and we help you pick it. Here is what common shower tiles cost per square foot for material alone (based on current material prices):
Tile | Material cost per sq ft | Best for |
|---|---|---|
Ceramic subway tile (3x6, 4x12) | About $4 | Tub surrounds, classic shower walls |
Large format porcelain (12x24, 24x48) | About $8 | Modern walk-in shower walls |
Marble-look porcelain | About $10 | Marble style with low upkeep |
Porcelain penny tile or hex mosaic | About $10 | Shower floors |
Marble (Carrara, Calacatta) | About $18 | Luxury showers, benches |
Zellige or handmade-look tile | About $20 | Accent walls, niches |
Glass mosaic (1x1, 2x2 sheets) | About $22 | Niches, accent bands |
The biggest cost drivers are shower size, the floor system, niches, tile size and pattern, and any rot we find behind the old walls. A mud pan and a curbless entry cost more than a foam tray. Small mosaics and complex patterns take more labor per square foot.
Ready for a Tile Shower Installation Done Right?
A good tile shower installation comes down to the parts you never see: flat walls, a continuous membrane and a floor that drains. Aguirre Modern Tile has built showers across Greater Boston since 2016. We are registered under MA HIC #655072 and carry $1M in liability insurance. Ready for a shower with RedGard walls and a properly sloped floor? Send us photos and get your same-day tile shower estimate.
Frequently Asked Questions
How long does a tile shower installation take?▾
How much does a tile shower cost in Boston?▾
Is a foam shower tray better than a mud pan?▾
What waterproofing do you use on shower walls?▾
Do I need a plumber for a tile shower?▾
How much does a shower niche cost?▾
Need Shower Tile Installation?
Send us photos and get a same-day estimate.